Nowadays websites getting blocked by governments to protect themselves from sensitive information as well as ISP’s (Internet Service Provider) intentionally blocking sites to save bandwidth is common across the globe. But in this digital era, we depend on certain websites for our daily information exchange, websites like Facebook, Youtube, file-sharing services and P2P networks are few to mention, which most of the internet users depend on. For example China blocks sites whenever users try to access info on human rights. Almost all the corporate networks could not be accessed from out side of the office. But the technology of internet has grown to a great extent that no one could block any of the websites. If a site is online then you can access it.
Though there are various methods to access blocked sites ( e.g DNS Unblock services are easier to setup to access blocked sites), one method is pretty effective of all the other. That is VPN – Virtual private Network, but VPN is not created just to access blocked sites by some ISP. The sole purpose of VPN is entirely different. A Virtual Private Network is used to extend the private network to a public network, to be clear a VPN is a private network that uses a public network (Internet) to connect remote sites or users together. The VPN uses “virtual” connections routed through the Internet from the business’s private network to the remote site or employee at the same time providing secure connection by means of encrypting the data sent over the internet.

Now let us look into simple steps of establishing a Virtual Private Connection – widely known as Private tunnel.
Step 1:
Download and install OpenVPN from here http://www.openvpn.net/
Step 2:
Download the .ovpn files – this is the connection setting file which can be downloaded from Public VPN Relay Servers List page.
The config file I use is from FreeVPN which provides unlimited access and supports even torrent sites.
Step 3:
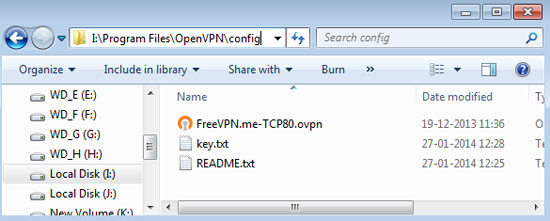
Now open the “C:\Program Files\OpenVPN\config” folder, and copy the .ovpn file into this folder. Which is I:\Program Files\OpenVPN\config in my case.
Step 4:
Now right-click the “OpenVPN GUI” icon on the desktop, and click “Run as administrator”, you must use “Run as administrator” else, VPN connection will fail.
Step 5:
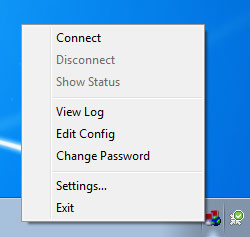
You can now see OpenVPN GUI icon on the task-tray of Windows at the bottom-right of the screen, right-click on the OpenVPN GUI icon, and click “Connect” .
Now it will ask for Username and Password, which you will get from the VPN config file providers. Enter them and VOILA!! – Your VPN connection will be established. Now you are free to roam anywhere on the internet, free to access any website, no one can sniff you out and also you have hidden your “a$$”, sorry your IP successfully.