WordPress by default uploads images to “wp-content/uploads” and organizes them according to Year and Month. There might be certain scenarios where you need to protect the uploads folder, for e.g if you are using WordPress plugin like s2member or defining rules in htaccess file, to deny access to the files within the protected folder, then you may not be able to provide links or even place images embedded in image tags. Some times you may want to completely hide the actual folder where the larger images are residing, so users can’t gain direct access to larger images, thereby saving bandwidth. In such situations you can move the thumbnails generated by WordPress Media Uploader to a different folder. We will look into the necessary steps to achieve that.

Change the Default WordPress Uploads Folder
First let us change the default WordPress Uploads folder. You need to place the following single line of code in wp-config.php that is available at the root of your WordPress installation.
define('UPLOADS', 'wp-content/Myfolder');
You can provide any valid folder name in place of “Myfolder”, and you need to place it before this line in your wp-config.php.
require_once(ABSPATH . 'wp-settings.php');
Now you have successfully changed the default uploads folder in WordPress and all your uploads through Media Uploader will be placed into this folder. Now let us say, we enforce protection on this “Myfolder” folder, so that no one can access or hotlink images and files within this folder, but such restriction will break all thumbnails and images attached to your WordPress posts as they are from the protected folder. The best possible solution is to move thumbnails out of the protected folder and use those images wherever you need to serve them.
Setting additional image sizes for thumbnails and posts in WordPress.
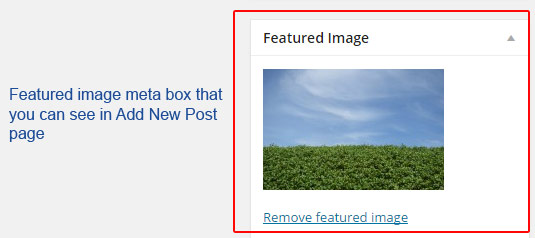
But before going into the steps of moving it, let us give some name and size for our post thumbnails and post images. Here, by “post thumbnail” I mean featured image in WordPress and “post images” refers to the larger or medium sized images displayed within the single post. We will provide a meaningful name and set the required size for featured image and post images.
 With featured images you can create post galleries, grid based or masonry themes in WordPress.
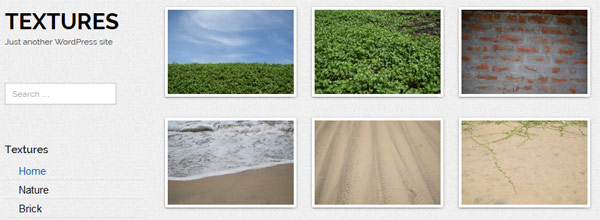 A sample post gallery that uses featured image to display posts.
From the above 2 images you can infer that featured images in WordPress is a powerful feature to create post galleries or grid themes with it. Featured images can be enabled in all themes by adding the following line to functions.php found within the theme folder.
add_theme_support('post-thumbnails');
Adding the above line will add featured image meta box in your add new post page, Now let us set the size of the featured image, which can be done with “set_post_thumbnail_size” function in WordPress. You can include this line in your functions.php.
set_post_thumbnail_size( 180, 120 );
The above line sets the size for image name “post-thumbnail” which is set in media.php of WordPress, and this will be the name you will use to retrieve the featured image, and this will be the size of our featured image, you can specify your own width and height. Now let us define one more image name and size which will be used in the single posts. You can use “add_image_size” function in WordPress to do this. You can add this line to your functions.php.
add_image_size( 'post_image', 600, 400 );

The above function defines a new image name with width and height. What will this actually do?, First go to WP Dashboard ->Settings->Media, there you can see different sizes already defined by WordPress, the “add_image_size” adds additional image size with a custom name defined by us, which is used by the Media Uploader to resize the image accordingly, when you upload an image.
For e.g when you upload an image named “deer.jpg”, which is around 2000×1000 pixels, Media uploader saves the original image and creates additional sizes that is set through Dashboard->Settings->Media, plus the sizes defined by the user using “add_image_size”, and each image will be renamed according to the size of the image, in our case we have added a size of “600×400” pixels, so the resulting image name will be “deer-600×400.jpg” and another image named “deer-180×120.jpg”, which we had set for the thumbnails.
Move thumbnails to a different folder in WordPress
WordPress, doesn’t provide any hooks to tap into Media Uploader while resizing images, in fact Media Uploader part in WP is where we are left in dark without much hooks to control the image uploads. But there are few which can help us to achieve what we are intended to do. This hook “add_attachment” fires every time an image is uploaded, but before generating additional sizes. So hooking into this we can only retrieve the actual image that we upload, and not the thumbnails or other resized images, which we want to move to a different location. So we have to look at a different WP hook to do this, and here comes…
admin_post_thumbnail_html – hook
The above hook is triggered every time the featured image meta box(discussed above) is generated, and it happens when we are on add new post page or editing an existing post. This hook actually provides you with 2 different data, and you can add an action to this hook in WP like this.
Also you must know this hook is triggered once, as soon as you open the add new post page, when it adds the featured image meta box. But at this point the featured image meta box will not have any image, because we haven’t uploaded any image yet. It triggers again when we have completed uploading an image through Media Uploader, and return back to post editing page, this time we will have thumbnails and other images we had already defined, because Media Uploader would have generated them.
add_action( 'admin_post_thumbnail_html', 'my_thumbnail');

The above line will call “my_thumbnail” function when the hook is triggered. Now let us look in to the actual function that moves the required images like thumbnails and post images to a different folder, while leaving the actual images intact, As I said the ‘admin_post_thumbnail_html’ will provide you with 2 data.
- Content – the actual html markup of the featured image.
- post_id – id of the current post
So here, our function “my_thumbnail” will be written this way
my_thumbnail( $content, $post_id );
Here is the actual function that I wrote in my functions.php, which will move the thumbnail image( 180 x 120) and post image ( 600×400 ) to a different folder. Here I am going to move the thumbnail from “Myfolder” to “Thumbnails”, and both the folders will exist in wp-content folder of WordPress.
add_action( 'admin_post_thumbnail_html', 'my_thumbnail', 10, 4 );

function my_thumbnail( $content, $post_id ) {

	if( !stristr( $content, "-181x121" )) // return if thumbnail is not yet generated.
		return $content;
	else {
               //get the thumbnail image ( 180 x 120 px )
		$img_thumb = wp_get_attachment_image_src( get_post_thumbnail_id( $post_id ), 'post-thumbnail' );
               // call the function to move the thumbnails
		move_thumbnails( $img_thumb[0] );

               // get the post image ( 600 x 400 px )
		$post_thumb = wp_get_attachment_image_src( get_post_thumbnail_id( $post_id ), 'post_image' );
                // call the function to move post image.
		move_thumbnails( $post_thumb[0] );

            // replace the folder name in html markup as we have moved the image to a different folder.
             $content = str_replace( "Myfolder", "Thumbnails", $content );

	    // return the content so featured image can be displayed.
	      return $content;
	}
}
And here is the function “move_thumbnails” which takes an image src as an argument, parses it and does the required action, This function along with the above lines of code should be added to functions.php.
function move_thumbnails( $imgsrc ) {

	$img = substr( $imgsrc, strpos( $imgsrc, "Myfolder" ) + strlen( "Myfolder" ));

	$dirs = wp_upload_dir();
	$cont_path = dirname( $dirs['basedir'] );

	$thumb_path = $cont_path . "/Thumbnails" . $dirs['subdir'];

	if( !file_exists( $thumb_path ))
		@mkdir( $thumb_path , 0777, true);

	$src_path = $dirs['basedir'] . $img;
	$dest_path = $cont_path .  "/Thumbnails" . $img;

	if( !file_exists( $dest_path ))
		rename( $src_path, $dest_path );
}
The above code just reconstructs the path, creates necessary directories and moves the thumbnails and other required images from default WordPress upload folder to another folder. You may need to refer WP codex if you need clarity on “wp_upload_dir” function. Also remember that you need to re-construct the image src wherever you use the thumbnails and post images.
For e.g image in a single post can be displayed like this.
$img_thumb = wp_get_attachment_image_src( get_post_thumbnail_id(), 'post_image', false);
$pimg = substr( $img_thumb[0], strpos( $img_thumb[0], "Myfolder" ) + strlen( "Myfolder" ));
$imgsrc = content_url() . "/Thumbnails" . $pimg;

<img src="<?php echo $imgsrc; ?>" alt="<?php echo the_title(); ?>" />
The above lines will retrieve the “post_image” (600×400 pixel ) which we defined earlier, and displays the image. You can do the same for any custom images you have defined.